We’ve all been there before.
You’ve got a great idea. This lead gen video is going to be the next Dropbox success story.
You talk to your video team. You write the script. Everyone is excited. You shoot the video. World-domination, an IPO and/or a promotion are mere frames away. You launch the video. That upload click has never felt so good.
…
Then the crickets start. And when you watch the video you realize… “this is nothing like what I had in mind!!”
What gives?
Shoulda made a storyboard.
Some people think a storyboard has got to be a Pixar-level work of art in and of itself. Or that you’ve got to be able to draw or be creative to make a good storyboard. That couldn’t be further from the truth.
Here’s a simple process we use to make storyboards so there’s less of a chance of botching production.
It’s Got To Start As An Outline
Storyboards (unfortunately) aren’t magic. If you don’t know what you’re going to say, there’s no saving it.
There are a few common outlines you can use to get started. Here are two every video marketer should have in their tool belt:
1. Hero’s Journey
Here’s a link to a free Google Doc template that spells this out.
Stories from Star Wars to Dropbox’s legendary explainer have harnessed this framework to make high-growth videos.
It goes like this:
- Meet the Hero, Bob.
- Bob has got a problem.
- He tried this, that, and the other thing and they didn’t work.
- Then he found the solution which works like this __________.
- Bob got this sweet, positively emotional pay-off + call to action.
2. Problem, Agitate, Solve
Check out this link for the Google Doc template
Cheesy infomercials have made BILLIONS with this framework.
The idea is when there’s a pressing problem you don’t want to let up on the pain, but keep pressing forward so it’s clear how much they need your solution.
Here’s a breakdown:
- Do you have this problem?
- Here are the things making your problem worse.
- This solution focuses explicitly on your big problem.
- Customer testimonials or proof.
- Benefit recap and call to action.
Choose Your Software
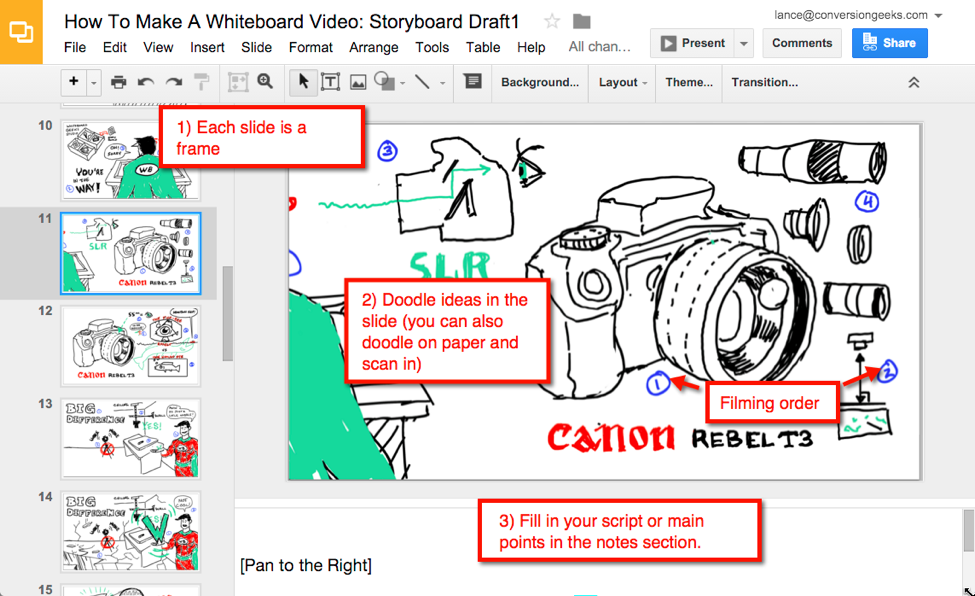
My software of choice is Google Presentation. One because it’s free, but two because it’s familiar and has almost zero roadblocks to getting started.
If you’ve got some paper, a cell phone camera/scanner and a Google account you’re ready to go.

Here’s a helpful, free slide template you can use. Or if you like to do the pencil-to-paper method, here are a few printable word docs.
If you’re looking to get a bit more fancy you can take a look at StoryboardThat.
Highlight Your Critical Frames
Inside a two minute video you may not have a ton of scenes, but there will always be a few critical frames.
Every marketing storyboard should have frames for:
- Opener
- Problem Statement
- How the Solution works ← Often the most critical to storyboard.
- Call to action ← This is a close second in terms of storyboard need.
Frame 1 – The Opener
The main goal in the first frame is to create a sense of mystery. If you’re working on a lead gen video, this is doubly important since a visitor is normally trading their contact info to scratch the itch of their curiosity.
Frame 2 – Problem Statement
This is the frame that should get your viewer’s head nodding (or qualify out the ones who shouldn’t be watching anyway). If you have any dark or depressing frames, this is where they’ll go.
Frame 3 – How Your Solution Works
My favorite frame of all. This is where your marketing chops come into play. You can shave major time off an explanation with a well-thought-out solution frame. Binge watch the explanation section of some late night infomercials to see this one done exceptionally well.
Frame 4 – Call To Action
Without this you might as well go home. This is a nitty gritty frame, with the most important factor being clarity. Is your URL easy to read? Did viewers see where to click? Does your info stay on screen long enough?
One important note: some frames are important to script well but don’t really need their own storyboard. For example, benefit statements are critical to a script, but as long as your wording is right, your imagery may not be as essential.
Doodle Your Frames
Nearly every video I make starts as a doodle. Ironically, I can’t draw but it doesn’t take complicated images to get the idea across. My go-to images? Stick figures for people, and labeled rectangles for objects.
Some of the keys you’re going for are:
- Positioning. Show the artist or videographer how the scene needs to be setup.
- Timing. Get across how the audio is going to be timed against the visual.
- Transitions. How much info is too much in your scenes? When should you cut? Pay attention to how your scenes are flowing into each other or if it feels like they’re not changing for a long period of time.
Do A Dry Run
The main value of storyboards is being able to run through your script and feel how your video is going to go BEFORE you’ve spent the time and money on production.
So fire up your script, pull out your key frames and do a dry run. This is the step where the heaviest tweaking and revisions will come in and by doing it at the storyboard stage you’ll be saving yourself time and money.
John Lasseter, Pixar’s Chief Creative Officer puts it well.
“I will never let something go into production unless it is working fantastic in that version with the still drawings. Because no matter all the great animation you can do will never save a bad story. We will work and rework and rework and rework these reels — sometimes thirty times before we let it go into production.”
Go Forth And Storyboard!
While it seems like a little more work upfront, dropping in a storyboard step can save major time in production.
If you have any tips of your own, please share them below!
Updated in 2017: A Visual Storyboarding Template
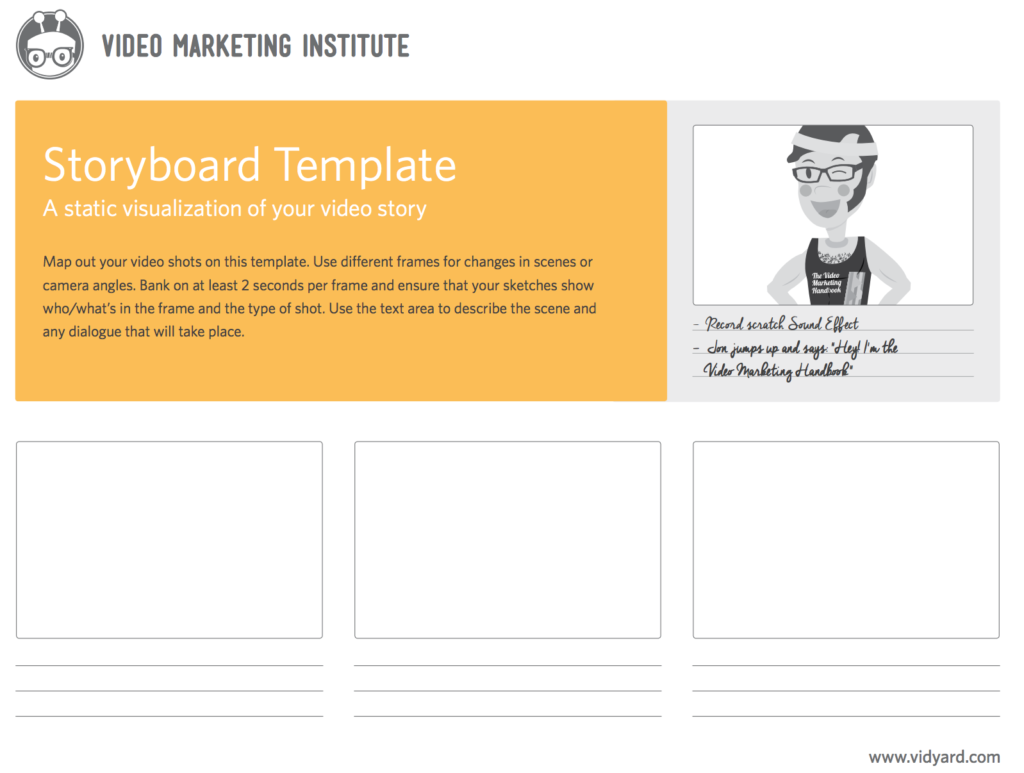
Lance talks quite a bit about using visual aids in your storyboarding, and we couldn’t agree more. So we decided to make our own internal storyboarding template available for everyone.
The first page is a quick instructional guide on how to lay out your shots, and what to use all these fancy little boxes for:
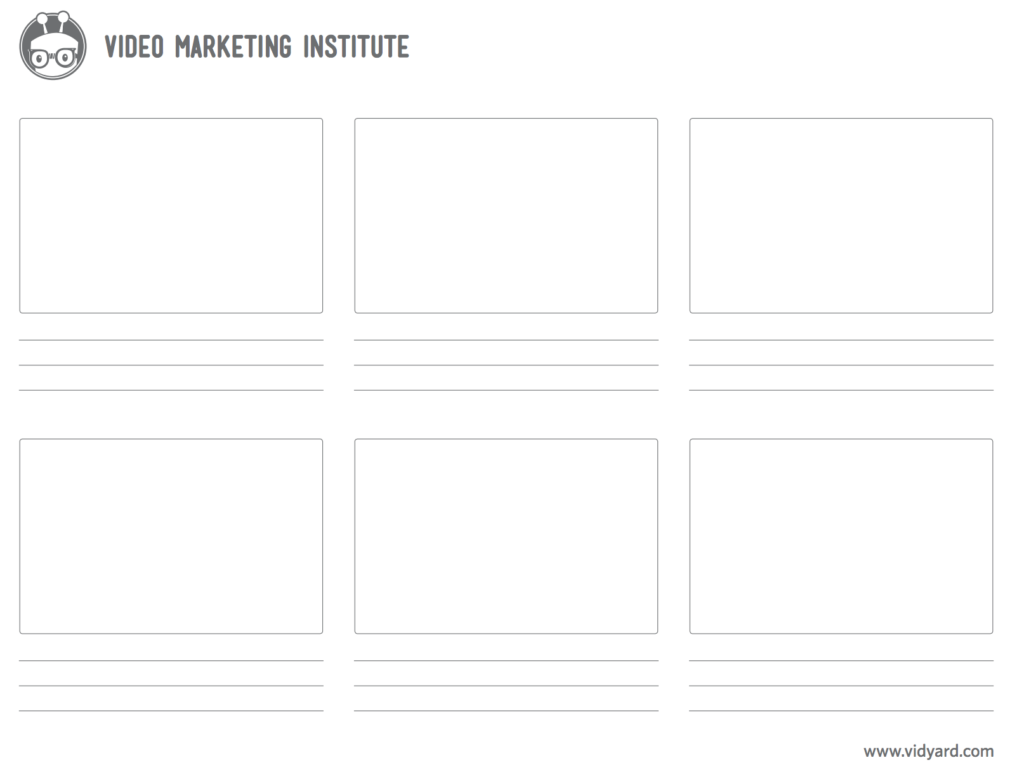
Page two is the important one though, as you can print as many copies of this blank storyboarding template as you need to lay out all of your shots!
 This simple but powerful tool is incredibly important, whether you are filming your own videos in-house, or working with an agency on your creatives. Storyboarding each scene in your video allows you to ‘see’ the shots before you start setting up, and saves time and confusion when you’re ready to film. Even a simple, stick-figure storyboard goes a long way to making better video. Download the template and get started!
The post The Non-Artist’s Guide To Storyboarding Marketing Videos appeared first on Vidyard.
source http://www.vidyard.com/blog/the-non-artists-guide-to-storyboarding-marketing-videos/


No comments:
Post a Comment